Have you ever wanted to make your very own paper frog? In this article, you will learn just how to do that! Making a paper frog is a fun and creative craft that anyone can try. All you need is a piece of paper and a few simple folds, and you’ll be amazed at how your paper frog comes to life. Get ready to dive into the magical world of paper folding and create your very own little froggy friend!

Understanding Origami Art
Origami is the art of folding paper into various shapes and figures. It originated in Japan and has been around for centuries. The word “Origami” is derived from two Japanese words – “ori” meaning folding, and “kami” meaning paper. This beautiful art form allows you to transform a simple sheet of paper into intricate and detailed creations.
Supplies Required
To get started with origami, you will need a few supplies. The first thing to consider is the choice of paper material. It is important to use paper that is thin and easy to fold. Traditional origami paper, also known as kami, is often used as it is specifically designed for this craft. However, you can also use colored scrapbook paper or even regular printer paper if that’s what you have on hand. Just remember that sturdier paper might be a bit harder to fold.
The size of the paper required depends on the complexity of the origami design you want to create. Generally, you would want to use a square sheet of paper. The size of the square can vary depending on the instructions, but a good starting point is a 6×6 inch or 15×15 centimeter paper.
Useful tools for origami crafting are mainly your hands and some patience! However, if you want to make your origami experience a bit easier, you can also use a bone folder or a ruler to help with precise folds. These tools can assist in creating crisp and clean lines, especially if you are working with thicker paper.

Basics of Paper Folding
Before diving into creating specific shapes, it’s important to understand the basic techniques of paper folding. There are two main types of folds used in origami: the mountain fold and the valley fold.
A mountain fold is created by folding the paper towards you, creating a raised ridge. You can imagine a mountain peak appearing on the paper. On the other hand, a valley fold is made by folding the paper away from you, creating a trough or a valley on the paper. These folds are the foundation for many origami designs.
There are also some essential rules to keep in mind while folding paper. First, make sure to fold along the lines provided in your instructions. These lines are there to guide you and help you create the desired shape. Additionally, always fold on a flat and clean surface to avoid any accidental creases or wrinkles in your paper.
To practice basic folds, you can start with simpler designs like a paper airplane or a paper boat. This will help you get comfortable with the techniques and improve your skills before moving on to more complex origami creations.
Preparing the Paper
Preparing the paper is an important step in creating a successful origami piece. The color of the paper can play a role in the final appearance of your creation. Some origami designs, like the paper frog, are traditionally made with green paper to resemble the color of a real frog. However, feel free to experiment with different colors and patterns to add your own creative touch to your origami art.
Next, you’ll need to cut the paper to the correct size. If you’re using origami paper, it often comes pre-cut into squares. However, if you’re using a different type of paper, you may need to cut it yourself. Remember to measure and cut accurately to ensure a neat and proportional final result.
Lastly, it’s important to ensure the quality of the paper you’re using. Avoid using paper that is too flimsy or prone to tearing, as this can make the folding process more challenging. Choosing a paper with a slightly heavier weight and a smooth texture can make your origami experience smoother and more enjoyable.

Step-by-Step Instruction: Basic Shape
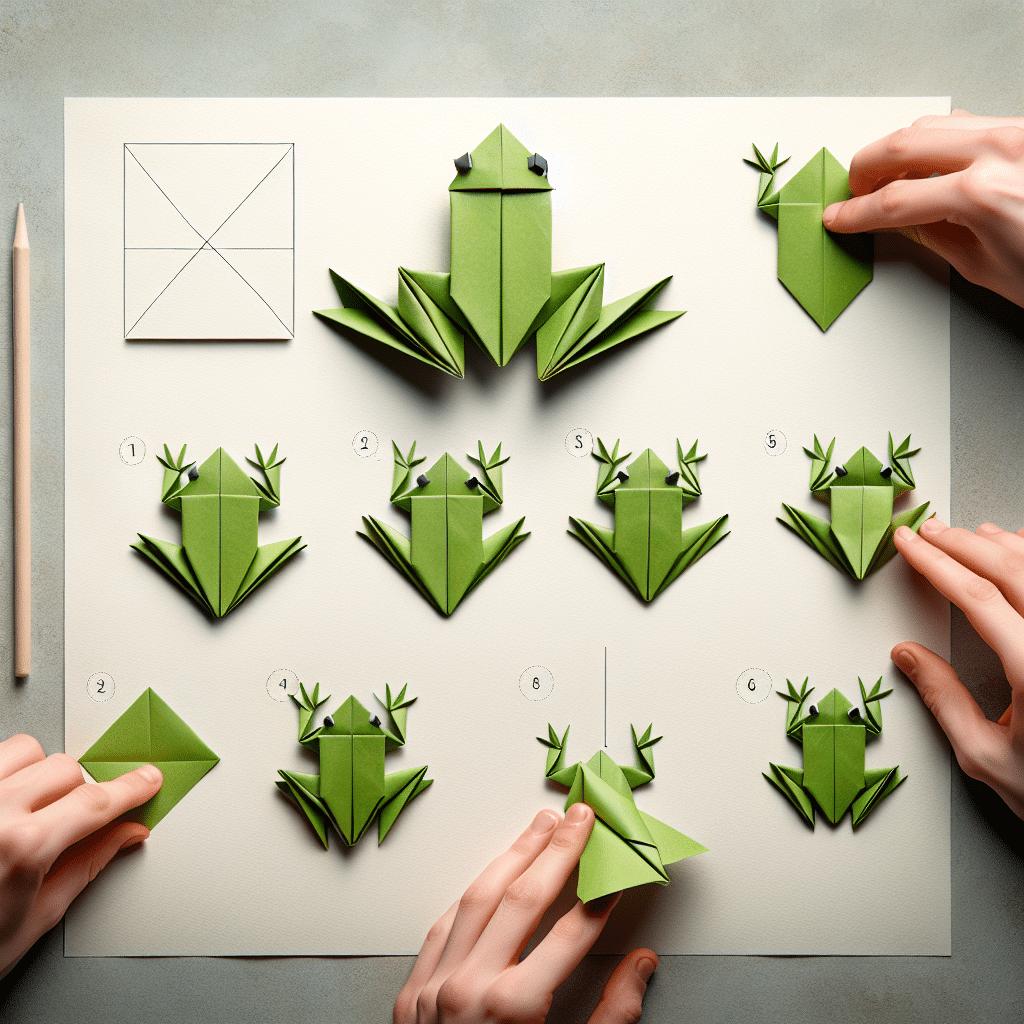
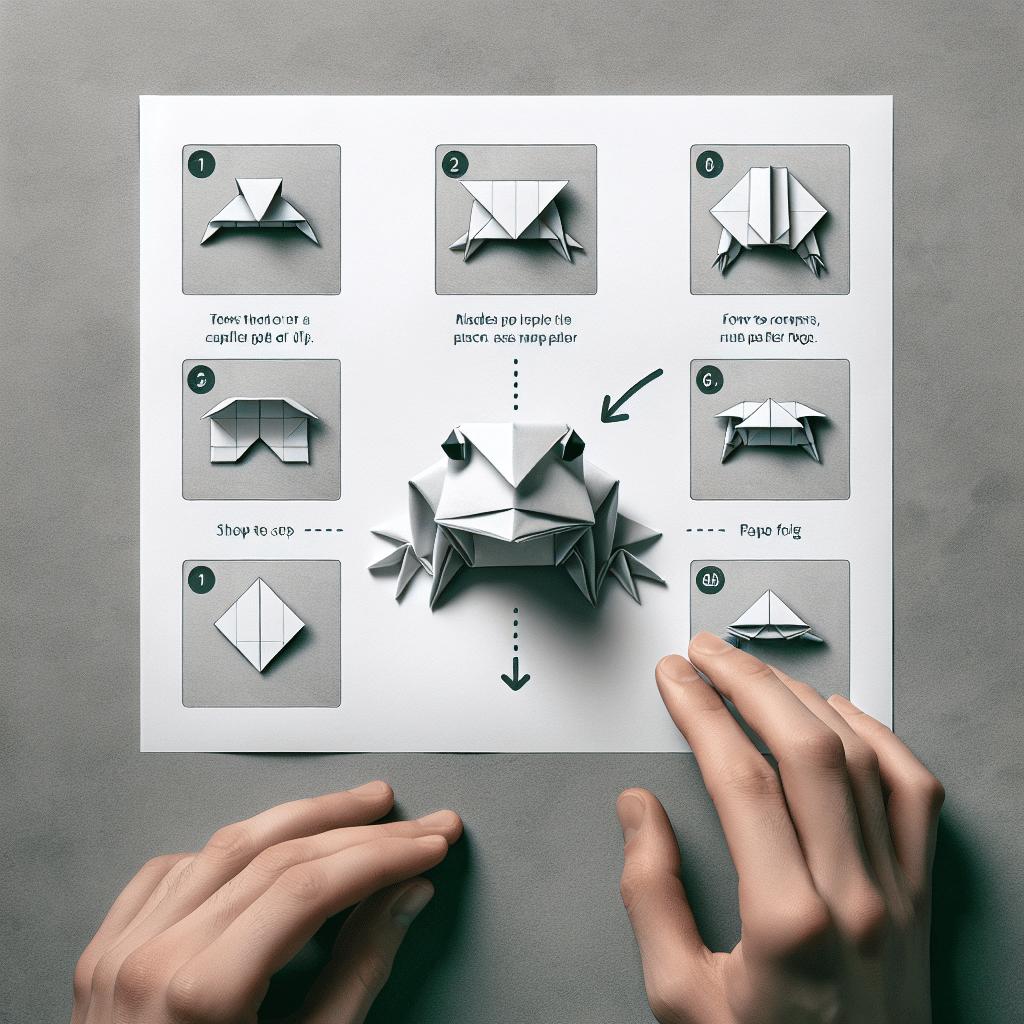
Now that you’re familiar with the basics, let’s dive into creating a paper frog! We’ll start with the basic shape as a foundation for the more detailed structure. Follow these step-by-step instructions to create your own paper frog masterpiece.
-
Creating the Preliminary Fold:
- Start with a square piece of paper.
- Fold the paper in half diagonally, from one corner to the opposite corner.
- Unfold the paper and repeat the fold diagonally in the other direction.
- Unfold the paper again, so you’re back to the square shape with creased diagonal lines.
-
Forming the Basic Square Base:
- Hold the paper with the colored side facing down.
- Take one corner of the square and fold it towards the center. Repeat with the opposite corner.
- Flip the paper over to the other side.
- Take one corner and fold it towards the center, aligning it with the previous folds. Repeat with the opposite corner.
- Flatten the paper to reveal a smaller square shape with a colored side facing up.
-
Techniques of Folding and Unfolding:
- Look for the triangular flaps on each side of the square base.
- Take one of the flaps and fold it up towards the top of the square.
- Repeat with the other flap, folding it up to meet the first fold.
- Unfold both flaps while keeping the smaller square shape intact.
Step-by-Step Instruction: Intermediate Shape
Now that you have the basic structure of the frog, let’s add some more details! Follow these steps to turn the square base into a bird base and define the body features of your paper frog.
-
Turning Square Base into Bird Base:
- Hold the paper with the colored side facing down.
- Take one corner of the square and fold it towards the center. Repeat with the opposite corner.
- Flip the paper over to the other side.
- Take one corner and fold it towards the center, aligning it with the previous folds. Repeat with the opposite corner.
- Flatten the paper to reveal a smaller square shape with a colored side facing up.
- Look for the triangular flaps on each side of the square base.
- Take one of the flaps and fold it towards the top of the square.
- Repeat with the other flap, folding it up to meet the first fold.
- Unfold both flaps while keeping the smaller square shape intact.
-
Defining Frog’s Body Features: Legs and Eyes:
- Look for the smaller triangular flaps on each side of the bird base.
- Take one of the flaps and fold it towards the centerline of the paper.
- Repeat with the other flap, folding it towards the centerline as well.
- Unfold the flaps and turn the paper over.
- Fold the bottom edge of the paper up slightly to create a small section for the frog’s eyes.
- Using a pen or marker, draw two small dots on the folded section to represent the frog’s eyes.
-
Important Folding Techniques to Be Used:
- To create the frog’s legs, take one of the flaps from step 2 and fold it diagonally towards the bottom corner of the paper.
- Repeat with the other flap, creating another folded leg.
- Unfold the flaps to return to the previous step, and your frog’s legs will be visible.
Step-by-Step Instruction: Detailed Structure
Now that your paper frog is taking shape, let’s add some intricate details to make it more lifelike! Here’s how you can add the frog’s fingers, toes, and mouth.
-
Adding Intricate Details: Fingers, Toes, and Mouth:
- Look for the triangular flaps on each leg of the frog.
- Take one of the flaps and fold it diagonally towards the outer edge of the leg. Repeat with the other flap to create finger-like shapes.
- Still using the flaps on the frog’s legs, fold the edges of each flap inward to create toes.
-
Keeping the Structure Intact:
- As you add more details to the frog, make sure to keep the folds crisp and firm. This will ensure that the structure of the frog stays intact and looks well-defined.
-
Common Pitfalls in Detailing Structure:
- Some common mistakes to avoid while adding intricate details are folding too vigorously, which can tear the paper, or not folding firmly enough, resulting in a flimsy structure. Take your time and be gentle while handling the paper.
Complementary Tips and Tricks
To make the most out of your origami experience and create beautiful paper frogs, here are some additional tips and tricks to consider:
-
Enhancing Precision:
- Practice makes perfect! The more you fold, the better you’ll become at creating precise and well-defined origami shapes. Take your time and be patient with yourself as you learn this art form.
-
Maintaining Paper Cleanliness:
- Keep your workspace clean and free from any dirt or debris. This will help prevent any marks or stains from transferring onto your paper and detracting from the final result.
-
Dealing with Paper Tears or Wrinkles:
- If you accidentally tear your paper, don’t worry! You can always start over or try to salvage the piece by using tape or glue to mend the tear. Similarly, if you encounter wrinkles, you can use a gentle touch with your fingers or a bone folder to smooth them out.
Common Mistakes in Crafting Paper Frog
Crafting a paper frog can be a fun and rewarding experience, but it’s not uncommon to make a few mistakes along the way. Here are some typical errors you may come across while crafting your paper frog.
-
Identifying Typical Errors in Steps:
- One common mistake is not following the instructions correctly. Make sure to carefully read and understand each step before proceeding. Double-check the folds and alignments to make sure they match the instructions.
-
Effect of Mistakes on Final Outcome:
- Mistakes can affect the overall look and integrity of your frog. Misaligned folds or improperly formed features might make your frog appear less realistic or even cause it to fall apart.
-
Correcting the Errors Properly:
- If you notice a mistake, don’t panic! Origami is all about practice and learning. Take a step back, undo the problematic fold, and try again. Remember that mistakes are part of the learning process and can lead to improvement.
Unfolding and Refolding the Masterpiece
Once you’ve completed your paper frog, you may wonder what comes next. It’s time to unfold and refold your masterpiece! Unfolding your origami creation gives you a chance to appreciate the intricate folds and techniques that went into creating it. Take your time and enjoy the process of unfolding your frog.
By refolding your frog, you can further train your origami skills and understand the intricate details of the folding techniques used. Refolding also allows you to practice and explore different variations of the frog design.
After you’re done exploring and learning from your creation, it’s essential to preserve your artwork. You can carefully place your paper frog in a protective sleeve or display it in a frame. This will help keep it safe from dust and other potential damages.
Take a step back and admire the beauty of your paper frog. Notice the precision in the folds, the creativity in its design, and the effort you put into making it come to life. Origami is not just about creating a finished product; it’s about embracing the art of folding and expressing your creativity through paper.


